Blogger is one of the best platform for Blogging. But having the setup of custom domain on it will be great to look more professional. To add custom domain of BigRock on Blogger from sub-domain to custom domain is easy. If you just have purchased the custom domain from BigRock then you must have been looking for How To Add Custom domain on Blogger Blog tutorial on net. So if it is true then you're at right place. In this step by step guide we'll tell you about how to add custom domain on blogger blog easily without having issues. So follow the below steps carefully to map your custom domain to Blogger Blog.
As we all know that BigRock is providing some best domains on this festive season at cheapest price. So its a great opportunity to buy the domain from one of the leading domain as well as hosting provider. BigRock is leading company in India to give better chance to have your custom domain in just affordable price. So if you haven't bought any then you can buy it from there.
How To Set Up BigRock Custom Domain on Blogger
Step:-1
For adding or mapping your domain on Blogger you first have to login your Blogger account as well as BigRock account in your browser separately. So you can easily toggle between them while adding A records and CNAME records.
Step:-2
After this you have to go to your blogger account then settings>Basic option and then go to Publishing> Third Party Domain Settings option.
Step:-3
Now add your full domain along with www.yourdomain.net and click on Save button. You'll get Error 12 like in the below image as you can see.It is asking you to verify your Host and CNAME in your Domain name. Now you have to copy the Host,Name and Destination, Targets and Points somewhere. We'll use this later on CNAME records. See the below image.
Step:-4
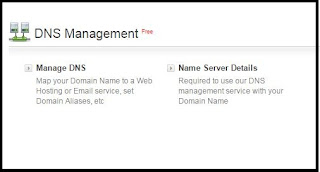
Now go to your BigRock account and click on your domain name. Now browse the DNS Management of your domain name. See in the below images.
Step:-5
After this click on Manage DNS option. Now here you have to click on A records. In this section you have to add 4 different A records for your domain by using these IPs one by one. See the image and add all four A records. The given IPs are:-
216.239.32.21
216.239.34.21
216.239.36.21
216.239.38.21
Leave the Host name blank as it is and add all four IPs in the Destination IPv4 address and use TTL Value 28800.
Step:-6
After adding all the different IPs in your A records. It'll look like the below image. See that we have added all four IPs in the same way.
Step:-7
Now go to the CNAME Records option and in the Host name box add WWW and in the Value option put the ghs.google.com and in TTL value add 28800 and save it. Now again click on CNAME option and recall the Step:-3 to add the another Host name and Value along with TTL value 28800 and save it. See the below images.
Domain Verification on Blogger.
Step:-8
Now again go to your blogger account.Settings>Basic>Publishing option there you have to again click on Save option to verify your blog domain name authority.
Step:-9
Done !! Now you'll be able to save the whole settings easily and your blog domain authority will be verified. Now check your blog with complete address like www.yourdomain.net.
Redirecting Issues
If you find your domain is not opening without using www prefix then again go to your blogger account>Settings>Basic>Publishing and then click on EDIT option just right side of your blog address. Now just below you'll see the option of Redirect yourdomain.net to www.yourdomain.net. Just check mark this option and you'll resolve this issue.
Final Words !!!
So this was the tutorial about how to set up custom domain on blogger. Then follow the above steps carefully and add your custom domain on blogger. If you face any issues then you can comment below.We'll surely help you out.


Which template have you installed in this blog ?
ReplyDeleteHiero Edited Template
ReplyDelete